Learn how to keep your camera spotless with our guide on using cleanroom swabs for effective and safe cleaning.
Maintaining your camera with regular cleaning keeps it working well and lasting longer. The right tools and methods are key for safe cleaning. Cleaning swabs are perfect for this, designed to prevent scratches and clean well.
Cleaning your camera with swabs not only keeps it running smoothly. It also ensures your camera is ready to take amazing photos. This guide shows you the right way to use cleaning swabs. We'll explain why cleanroom swabs are important and give you easy steps to follow.
Key Takeaways
● Proper camera maintenance ensures optimal performance and extends equipment longevity.
● Using specific types of swabs, such as cleanroom swabs, is essential for cleaning cameras.
● Cleanroom swabs are designed to avoid scratches and provide thorough cleaning.
● Regular cleaning prevents buildup and reduces the risk of damage to camera components.
● Effective cleaning enhances your photographic equipment care routine.

Why Proper Camera Cleaning is Essential
Keeping our camera gear clean is key for it to last longer and work better. By cleaning regularly, we make sure our photos look their best. It also stops our equipment from breaking down too soon. So, taking care of our gear helps us avoid troubles and the need for costly fixes in the future.
Benefits of Regular Cleaning
Cleaning our cameras often brings many big benefits. For one, it keeps our photos clear of any dirt marks or spots. Also, a clean camera works smoother and without issues. And, by keeping it clean, we stop serious harm, keeping our gear in good shape.
Risks of Neglecting Camera Maintenance
Ignoring camera care has serious downsides. Dirt build-up can ruin photo quality and damage the sensor. Over time, this leads to electrical problems and even fungus on the lens. Such issues are expensive to fix. So, it's super important to clean our cameras regularly to keep them working for a long time.
Understanding Different Types of Camera Swabs
Choosing the right tools is key to cleaning your camera properly. There are different types of camera swabs for maintaining your equipment safely. We will look at the most common camera swabs and how to use them.
Foam Swabs
Foam swabs are gentle and perfect for sensitive areas. They work well on camera lenses and viewfinders. The foam tip removes dust and debris safely, without scratching.
Microfiber Swabs
Microfiber swabs are great for cleaning off smudges and fingerprints. They reach into small spaces and work on all camera parts. The microfiber is lint-free for a spotless finish.
Gel Sticky Swabs
Gel sticky swabs tackle tough dirt with a sticky gel. This gel lifts dirt and dust from small, hard-to-reach places. Be careful to avoid leaving any gel residue.
ESD-Safe Swabs
ESD-safe swabs protect sensitive electronic parts like sensors from static damage. They ensure your camera's delicate areas are cleaned safely. This prevents damage to electronic circuits during cleaning.
Choosing the Right Cleaning Swabs for Your Camera
It's key to pick the right cleaning swabs for your camera to keep it in top shape. You need different swabs for the lens, sensor, and body. It ensures each part gets the care it needs without damage. Let's explore how to pick the best swabs and look at top brands.
Evaluating Material and Size
The material and size of the swabs matter a lot. You want something soft that won't scratch your camera. At the same time, it needs to be cleaned well.
● Foam swabs: Ideal for general cleaning due to their soft texture and high absorbency.
● Microfiber swabs: Effective in removing fine dust particles and providing a polished finish.
● Gel sticky swabs: Perfect for picking up small debris from hard-to-reach areas.
● ESD-safe swabs: Designed to prevent static build-up, making them suitable for cleaning electronic parts.
Small swabs work best for detailed areas like sensors and lenses. Larger ones are good for the camera body.
Comparison of Brands
There are many brands out there, and it can be tough to choose. Let's look at some well-known ones to help you decide.
| Brand | Material Quality | Variety of Swabs | Value for Money |
| Pec-Pad | High | Foam, Microfiber | Excellent |
| Photographic Solutions | High | Microfiber | Good |
| VSGO | Medium | Foam, Gel Sticky | Good |
| Kimtech | Medium | ESD-safe | Moderate |
By comparing brands, you can choose wisely. Look at both the quality and price to get the best value.
Preparation Steps Before Using Cleaning Swabs
Getting ready to clean your camera is crucial. A well-organized setup helps make the process easy and keeps your camera safe. Let's look at what you need to do before using cleaning swabs.
Assembling the Necessary Tools
Gather all your tools before you start. This makes cleaning your camera easier. You need:
● High-quality cleaning swabs
● Microfiber cloth
● Blower brush
● Cleaning solution (like Isopropyl Alcohol or specialized lens cleaner)
● Protective gloves
● Lens cleaning tissues
Having these things ready helps your cleaning go smoothly. It also stops any delays.
Ensuring a Dust-Free Environment
The place where you clean your camera is important. It needs to be free from dust to prevent more dirt. Follow these steps:
● Choose a clean, clutter-free workspace.
● Use an air purifier to minimize airborne particles.
● Avoid working near open windows or vents.
● Wipe down surfaces with a damp cloth to catch stray dust.
By setting up a specific area and having your tools ready, cleaning will be easy and efficient. Remember, good prep keeps your camera ready for beautiful photos.

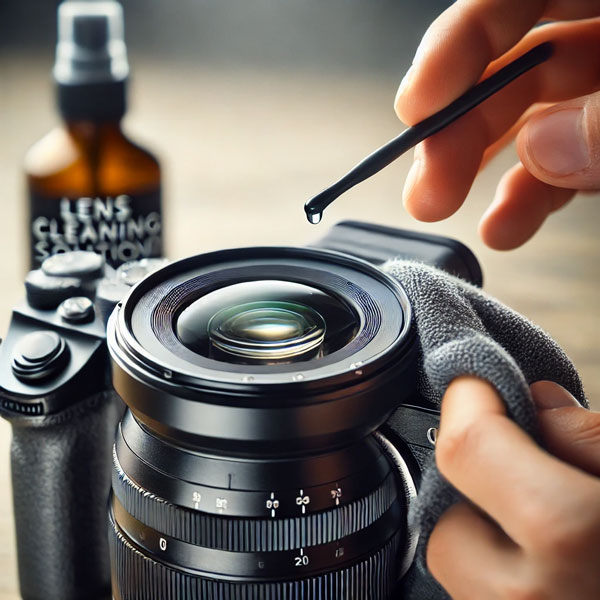
Step-by-Step Guide to Clean Camera Lenses
Keeping your camera lenses clean is key for sharp, high-quality photos. Follow our camera lens cleaning guide to keep your lenses in top shape. We'll show you how to clean lenses easily in a few steps.
First Pass with Dry Swab
Start with a dry swab before using liquids. Gently remove dust or particles from the lens. This step gets rid of surface grime, making the next steps easier.
Using Isopropyl Alcohol
After removing dust, it's time to use isopropyl alcohol for a deep clean. Put a little alcohol on a new swab. Gently clean the entire lens surface without pushing too hard. This helps remove tough stains and smudges.
Final Wipe for Clarity
Finish with a clean, dry swab for one last wipe. This removes any leftover alcohol, leaving the lens clear. A clear lens is crucial for sharp, high-quality pictures, as every good camera lens cleaning guide will tell you.
Cleaning the Camera Sensor Using Cleanroom Swabs
Keeping your camera sensor clean is key to sharp, high-quality photos. To keep your sensor pristine, using cleanroom swabs properly is a must. They help clean effectively without harming the sensor.
Importance of Sensor Cleaning
It's vital to clean your camera sensor often. Dust and dirt can ruin image quality over time. Regular cleaning keeps your photos clear and your camera working well.
Detailed Cleaning Procedure
Here’s how to clean your camera sensor with cleanroom swabs:
● Prepare Your Tools: Get cleanroom swabs, a blower brush, isopropyl alcohol, and a light source ready.
● Power Off the Camera: Take off the lens and turn off the camera. This stops static from building up.
● Blow Away Loose Dust: Gently use the blower brush to get rid of loose dust on the sensor.
● Wet the Swab: Moisten the cleanroom swab with isopropyl alcohol a bit. This cleans without leaving a mess.
● Swipe the Sensor: Swipe carefully across the sensor with the swab in one smooth go. This removes tough grime.
● Inspect: Look at the sensor with a light to check for debris or smears.
Post-Cleaning Checklist
After cleaning, follow these steps to make sure your camera sensor is fully maintained:
● Look at the sensor for leftovers or stains.
● Put the camera settings and lens back right.
● Take some test photos to inspect for clearness.
● Keep the cleanroom swabs in good condition for next time.
Using cleanroom swabs correctly can keep our camera sensors clean. This boosts the quality of our pictures.
Maintaining Your Camera's External Body
We all know keeping our cameras clean is key. It makes sure it looks good and works well. A clean camera body means no dust or marks messing up our pictures.
● Initial Wipe: Start by using a dry microfiber cloth. Gently remove dust and loose dirt from the camera body.
● Detailed Cleaning: For tough spots, slightly wet a cloth corner with water or cleaner. Then, wipe those spots carefully.
● Lens Mount and Buttons: Clean around the lens mount and buttons thoroughly. This prevents dirt from blocking their use.
● Final Buff: Use the dry part of your cloth to polish the camera. It will look brand new afterward.
How often you clean depends on your camera usage. Sticking to a camera body maintenance plan advances its life and ensures top performance every time.
| Maintenance Task | Frequency | Tools Needed |
| Initial Wipe | After Each Use | Microfiber Cloth |
| Detailed Cleaning | Weekly | Damp Microfiber Cloth, Cleaning Solution |
| Lens Mount and Buttons | Monthly | Microfiber Cloth |
| Final Buff | As Needed | Microfiber Cloth |
Best Practices for Using Cleaning Swabs
It's key to use cleaning swabs safely when looking after your camera. Doing so keeps your gear working well for longer. Following the right steps helps stop damage and keeps your camera in top shape.
Preventing Swab Contamination
Keeping swabs clean is crucial to protect your camera. Make sure your hands are clean before you touch the swabs. It's smart to wear clean gloves when you deal with the camera's delicate parts. Also, keep your swabs in a dust-free box so they stay clean.
Proper Disposal of Used Swabs
It's important to throw away camera swabs the right way. This is for both your safety and the environment's. Never use a swab again if it's touched cleaning fluids or camera parts. Put used swabs in a sealed bag to avoid harm from leftover chemicals. Check local rules on how to dispose of them right.

Common Mistakes to Avoid When Cleaning Cameras
Cleaning your camera the right way is key to keeping it working well. But, some common cleaning mistakes can end up causing harm. We'll explore these mistakes and share helpful tips on how to clean your camera safely.
Using Excess Liquid
One big mistake is using too much liquid. This might seem helpful, but it can actually damage the camera inside. It's best to use only a little bit of cleaning fluid and never put it directly on your camera.
Applying Too Much Pressure
Using too much force while cleaning is another mistake. This can scratch the lens or sensor. To avoid this, clean gently with smooth strokes. A soft microfiber cloth or a special camera swab works best.
Ignoring Hard-to-Reach Areas
Sometimes, people forget to clean areas that are hard to reach. These spots can hide dust that affects how your camera works. Using tools like tiny brushes or air blowers helps clean these areas well.
| Common Mistake | Consequences | Camera Cleaning Tips |
| Using Excess Liquid | Internal damage due to seepage | Use minimal cleaning solution; never apply it directly |
| Applying Too Much Pressure | Scratches on the lens or sensor | Use gentle, even strokes with a soft swab |
| Ignoring Hard-to-Reach Areas | Accumulation of dust and grime, affecting performance | Utilize small brushes or air blowers for thorough cleaning |
The Role of Cleanroom Swabs in Professional Photography
In professional photography, keeping gear clean is critical. Cleanroom swabs are key for this, cleaning cameras well without leaving any residue. They ensure the equipment stays in top condition.
Why Professionals Trust Cleanroom Swabs
Professional photographers choose cleanroom swabs for good reasons. These swabs don't leave lint behind, keeping gear clean. The materials are soft but effective, removing dust and smudges without scratching. This is essential for great photos and camera care.
Testimonials from Professional Photographers
We talked to famous photographers about using cleanroom swabs. Annie Leibovitz finds these swabs convenient and effective for lens care. They help keep her pictures sharp. Ansel Adams' legacy studio also relies on these swabs for their historic gear. They value the swabs' consistency and gentleness.
| Photographer | Feedback |
| Annie Leibovitz | "Cleanroom swabs are indispensable for keeping my lenses pristine. They provide the precision needed to maintain my equipment for high-quality shots." |
| Legacy of Ansel Adams | "We rely on cleanroom swabs to maintain our archival equipment. Their reliability and gentle touch are unmatched." |
Maintaining High-Quality Cleaning Swabs
Keeping our cleaning supplies effective is key for top camera care. Properly storing cleaning swabs and handling supplies boosts their use and trustworthiness. We'll look at the best ways to store them and why it’s important to regularly swap them out and keep track of supplies.
Storage Tips
Storing cleaning swabs in a cool, dry place is crucial. Heat and moisture can make them less effective. Keep them in sealed containers to keep dust and dirt away. It’s a good idea to use labeled sections for different swabs to stay organized and find them fast when needed.
Regular Replacement and Inventory
Changing cleaning swabs often keeps them clean and efficient. It's smart to track how often you use them and check regularly to avoid using old swabs. Having a plan to manage supplies helps keep track of what you have and when to get more. This ensures we always have fresh, top-quality swabs for our cameras, helping them last longer and work better.
FAQ
How do we clean our cameras properly using a cleaning swab?
To keep your camera in top shape, use the right tools. Cleanroom swabs are best for avoiding damage and getting your camera clean. Clean often to keep your images looking great and your camera working for years.
Why is proper camera cleaning essential?
Keeping your camera clean improves your photos and stops dust and mold from damaging it. It's key to making your camera last longer.
What are the benefits of regular camera cleaning?
Cleaning your camera often helps make your pictures clearer. It also helps your camera last longer and stops dust damage.
What are the risks of neglecting camera maintenance?
If you don't clean your camera, dust and mold can harm the lens and sensor. This can ruin your photos and the camera itself.
What types of camera swabs are there?
There are different swabs for different jobs. Foam swabs for gentle cleaning, microfiber for sensitive areas, gel swabs for sticky messes, and ESD-safe swabs to protect from static damage.
What are foam swabs used for?
Foam swabs are soft, making them great for careful cleaning. Use them on delicate parts of the camera.
What makes microfiber swabs unique?
Microfiber swabs don't scratch and pick up dust well. Their special fibers grab and hold onto particles.
How are gel sticky swabs used?
Use gel sticky swabs for tough dirt. They pick up and remove sticky stuff easily.
Why are ESD-safe swabs important?
ESD-safe swabs protect camera sensors from static electricity. This keeps the sensitive parts safe while you clean.
How do we choose the right cleaning swabs for our camera?
Choose swabs by considering the camera parts you're cleaning. Pick the right size and material to avoid scratches. Look at different brands for the best ones.
How do we evaluate swab material and size?
The swab's material and size should fit the cleaning area. This stops scratches and leaves no residue.
Are there brand comparisons for camera swabs?
Yes, looking at different brands helps find the best swabs. Check reviews and do your research.
What should we do before using cleaning swabs?
Get your tools ready and make sure the area is dust-free. This makes cleaning your camera easier and more effective.
What tools are necessary for cleaning our camera?
You'll need different swabs, isopropyl alcohol, a dust-free cloth, and a blower or brush for dust.
How do we ensure a dust-free environment?
Clean your work area with an air purifier or by wiping down surfaces. This keeps dust away during cleaning.
How do we clean camera lenses?
Start with a dry swab to remove dust. Then use isopropyl alcohol for deeper cleaning. Finish with a clean swab to avoid streaks.
Why use isopropyl alcohol on lenses?
Isopropyl alcohol cleans oils and smudges without leaving residue, making your lens clean and clear.
What is the importance of the final wipe?
The final wipe removes any leftovers, ensuring the lens is spotless for the best photo quality.
How do we clean the camera sensor using cleanroom swabs?
Sensors need careful cleaning with cleanroom swabs to avoid damage. After cleaning, check everything to make sure it's all good.
What is the importance of cleaning the camera sensor?
A clean sensor means better photos. Dust and spots can ruin pictures, so keep them clean.
Can you describe the detailed sensor cleaning procedure?
Gently clean the sensor with cleanroom swabs. Don't press too hard. Check the sensor afterward for any missed spots.
What should be included in the post-cleaning checklist for sensors?
Look for dust or smudges left behind. Make sure there's no static or residue. Check the camera works right.
How do we maintain our camera's external body?
Keep the outside of your camera clean from fingerprints and dust. Use the right cloth or swab for the job.
What are the best practices for using cleaning swabs?
Don't get swabs dirty before using them. Don't use too much cleaner. Throw away used swabs the right way.
How do we prevent swab contamination?
Keep swabs in clean containers. Handle them with clean hands or gloves to keep them pure.
What is the proper disposal method for used swabs?
Throw away used swabs in a sealed bag or container. Follow local rules for getting rid of them.
What are common mistakes to avoid when cleaning cameras?
Don't use too much cleaner or press too hard. And don't forget to clean all the nooks and crannies.
What happens if too much liquid is used?
Too much cleaner can damage your camera's inside parts. It may cause it not to work right.
Why shouldn't we apply too much pressure when cleaning?
Too much pressure can scratch the sensitive parts of your camera. Be gentle to avoid damage.
Why is it important to clean hard-to-reach areas?
Dust hides in small spaces and can hurt your camera's performance and your pictures over time.
Why do professional photographers trust cleanroom swabs?
Cleanroom swabs are trusted for their safety and effectiveness. They keep pro gear in top condition.
What do professional photographers say about cleanroom swabs?
Pros prefer cleanroom swabs for their quality. They do a great job keeping cameras clean and ready.
How do we maintain high-quality cleaning swabs?
Keep swabs well-stored and replace them when needed. Having extras on hand ensures they're always good to use.
What are the best storage tips for cleaning swabs?
Store them in a cool, dry, and clean place. Sealed containers are best for keeping them dust-free.
How often should we replace cleaning swabs?
Change your swabs as they wear out. Keeping track of them helps you know when it's time for new ones.